A carpet runner can improve the interior staircase of your house by adding style, color, and texture. This compact carpet strip offers both flair and utility when it’s positioned on a thick pad and fastened to tackle strips on every tread. Standard foam padding isn’t enough; steer clear of it.
Even for novices, installing a stair runner on a straight staircase is simple. Corner winder stairs are a little trickier, but they are doable with our professional advice.
Stair runners are made of wool, synthetic fibers, or a combination, and are priced per linear foot. They are available in widths of 27 and 32 inches. Visit a carpet retailer to look at samples of colors and patterns to locate the ideal fit for the design of your house.
Step 1: Gather Your Materials
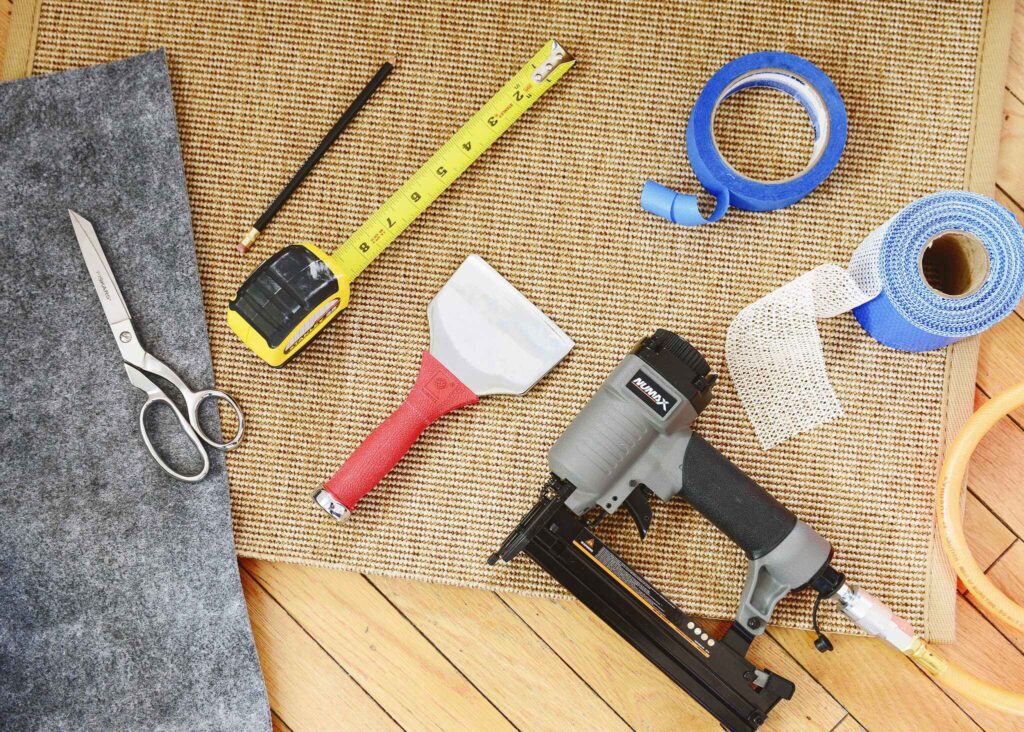
The key tools needed to install a stair runner include:
- The staple gun (either an electric or hammer type) and staples are essential items for installing a stair runner because they are used to firmly fasten the runner to the stairs.
- A carpet knife or a sharp utility knife can be used to make neat edges and cut the runner to size.
- Using a tape measure, precisely measure the stairs to get the required runner length.
- Hammer: Used to help set the staples, along with a stair tool.
- A carpet tucker, also known as a Roberts stair tool, assists in tucking and securing the runner into the corners and edges.
- Rug pad: Gives the runner a non-slip basis.
- Carpet tape is a useful tool for keeping runners secure, particularly on landings.
- A straight edge, such as a carpenter’s square or level, can help guarantee that the runner is put straight and square.
- Painter’s tape: During installation, this might serve as a visual guide to maintain the runner’s straightness.
- Shears or scissors: To cut the runner to size.
Step 2: Measure Your Stairs
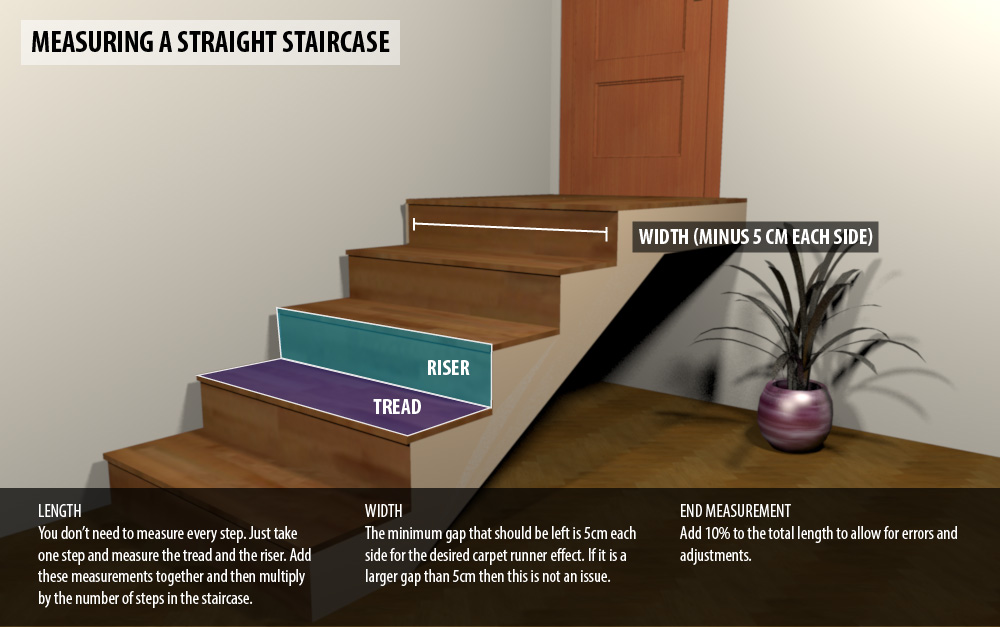
Here are the key steps to measure your stairs for installing a stair runner:
- Add the lengths of the stair tread and riser that you have measured. To find the entire length required for the runner, multiply this amount by the total number of stairs, including the top riser.
- To calculate the runner width, measure the width of each stair tread and deduct at least 5 cm (2 inches) from each side. If you’d like, you can leave a bigger space.
- Measure the width and length of the landing if you have a half-landing, then add those values to the total length.
- Measure the length of each step’s outer, widest edge on winding stairs, then extend that measurement over the riser below. For each step, repeat.
- The overall length measurement should be increased by 10% to allow for any mistakes or modifications required during installation.
- Think about the various alternatives for width, including the standard 28-inch width, and make your decision based on the style you desire for your stairs.
The secret is to measure every step precisely, including landings, to figure out how wide and long your stair runner needs to be. Making careful to take these precise measurements in advance will guarantee a good fit.
Step 3: Prepare the Stairs
Here are the key steps to prepare the stairs before installing a stair runner:
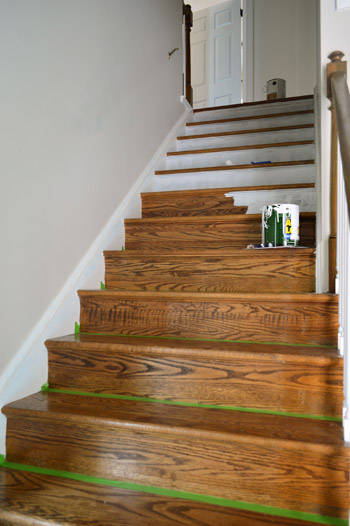
- Make sure the steps are spotless. To ensure effective adhesion of the runner, remove any dirt, dust, or debris by vacuuming or sweeping.
- If necessary, think about painting or refinishing the stairs. Before putting in the runner, now is a good time to give the steps a makeover.
- Using painter’s tape, mark the center of each stair tread and riser. This will assist you in correctly aligning the runner during installation.
- Every stair tread and riser should have its length and width measured. Calculate the overall length and width of the runner using these measurements.
- If you want to use an underlay or carpet pad, cut it to fit, making it roughly 20 mm thinner than the width of the runner you want. A staple gun can be used to attach the pad to the stairs.
- For added support in keeping the runner in place, cover the risers with carpet tape or adhesive.
- When measuring and cutting the runner for curving or winding steps, take into consideration the different widths. Give the wider side more space.
- Assemble all required equipment, such as a carpet knife, bolster chisel, tape measure, and staple gun.
It would be easier to install the stair runner smoothly and professionally if the steps are adequately prepared.
Step 4: Install the Carpet Padding
The main processes for installing carpet padding are as follows:
Calculate and trim the cushion:
Every stair tread and riser should have its length and width measured.
Make the padding slightly smaller than the desired runner width by cutting it to fit each step.
Steer clear of cutting a single, lengthy strip that can sag and buckle.
Position and secure the padding:
The first piece of padding should be placed against the wall, starting at the bottom of the steps, leaving a 1/2-inch space between it and the tack strip.
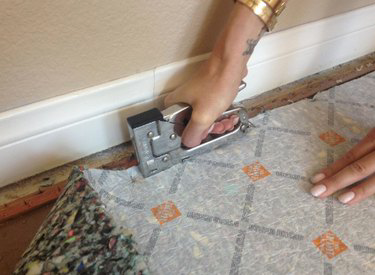
Using a staple gun, attach the padding to the stairs by spacing the staples 6 to 8 inches apart.
Ensure that there are no seam overlaps between the padding sections.
To help keep the cushioning in place, especially on landings, use carpet tape or glue.
Trim and finish:
With a utility knife, carefully trim the padding at the tack strips’ inside edge.
To stop moving, use seam tape to secure all seams.
To ensure that the carpet can adequately hold the pins, provide a 1/4-inch space between the tack strips and the padding.
The key is to carefully measure, cut, and securely install the padding to provide a stable, even base for the stair runner. Taking the time to properly prepare the stairs will lead to a professional, long-lasting installation.
Step 5: Install the Stair Runner
The key steps to installing a stair runner are:
Measure the stairs accurately:
- To find the total length required, measure the height of each riser and the depth of each tread.
- The runner width is calculated by taking the width of each tread and subtracting two inches.
- To allow for any modifications, add ten percent to the overall length.
Prepare the stairs:
- Thoroughly clean the steps to get rid of any debris or filth.
- Using painter’s tape as a guide, mark the center of each tread and riser.
- With a quarter-inch space between each step and the tack strips, cut and fasten the carpet padding.
Install the runner:
- Allowing two additional inches, begin at the bottom and fasten the runner to the first riser.
- The extra two inches should be folded under and stapled to the riser’s bottom.
- Step by step up the stairs, stapling the runner to each riser while maintaining tension.
- Sew the runner parts together carefully around the corner for landings.
Finish the installation:
- Place some quarter-round trim or another type of edging at the top.
- Apply any finishing touches, such as staining a strip of wood around the bottom.
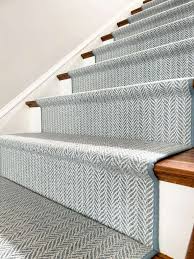
Common Mistakes to Avoid When Installing a Stair Runner
Avoid typical installation errors, such as positioning the tackle strip too close to the stair corner—it should be about 1/2 inch away—when installing a stair runner. Make sure that the tackless strip’s upward-facing pins are pointing in the direction of the stair corner. To avoid stretching, cut the padding into separate pieces for each stage and avoid overlapping it over the tackle strip. Cut the carpet slightly wider, then fold the edges to conceal any visible seams. To stop the carpet from flapping, firmly fasten it, especially at the nosing. For stability, place a non-slip rug pad below. Thorough measurement, cutting, and fastening of every component guarantee a polished, long-lasting installation.
For more, read: Weathered Oak Stain
FAQs about Installing Stair Runners
Q: How far should the tackless strip be placed from the stair corner?
A: The tackle strip should be positioned approximately 1/2 inch away from the corner between the tread and riser.
Q: Which direction should the upward-facing pins on the tackless strip point?
A: The pins on the tackless strip should face toward the stair corner for proper installation.
Q: Should the padding be cut in one long strip or individual lengths for each step?
A: It’s recommended to cut the padding to fit each step separately to avoid stretching and ensure a snug fit.
Q: How should the carpet edges be treated to prevent fraying?
A: Fold the long edges of the carpet back on themselves to conceal frayed edges and maintain a polished appearance.
Conclusion
By following these five simple steps, you can easily install a stunning stair runner that will enhance the beauty and safety of your staircase. With the right materials and a little bit of patience, you can transform your stairs into a stylish focal point that will impress your guests and add value to your home. So why wait? Start your stair runner installation project today and enjoy the benefits for years to come!

